为避免踩坑,凡是需要更改的文件都从
themes/主题复制到主目录下,个性化配置文件建议都在博客主目录下操作,减少更新主题时个性化配置被覆盖的麻烦。每次服务启动,会同步更新所有位置配置文件,但主目录配置文件优先级最高
yaml配置
添加行号后复制代码会带有行号
参考 小白hugo博客装修笔记(2)- B1ain’s Blog
手动复制有行号
在/assets/scss/custom.scss 文件中添加如下内容,将行号设定为不可选中
1// 手动复制禁止复制行号
2.highlight .ln {
3  user-select: none;
4}
copy按钮复制带行号
修改/themes/hugo-theme-stack/assets/ts/main.ts文件中的复制按钮逻辑。
但具体情况是,在本地进行调试时,确实手动复制和copy复制都会涉及行号。当部署到github pages打开后,copy不会有影响,反而手动复制可能会复制到行号。
所以具体情况看个人博客部署情况吧。反正能用,若要修改参考 Hugo-stackの美化
具体修改assets/ts/main.ts
 1highlights.forEach(highlight => {
 2    const copyButton = document.createElement('button');
 3    copyButton.innerHTML = copyText;
 4    copyButton.classList.add('copyCodeButton');
 5    highlight.appendChild(copyButton);
 6
 7    const codeBlock = highlight.querySelector('code[data-lang]');
 8    if (!codeBlock) return;
 9
10    copyButton.addEventListener('click', () => {
11        // 创建一个临时容器来克隆代码块的内容
12        const tempCodeBlock = codeBlock.cloneNode(true) as HTMLElement;
13
14        // 删除行号,行号的元素是 <span class="ln">
15        const lineNumbers = tempCodeBlock.querySelectorAll('.ln');
16        lineNumbers.forEach(lineNumber => lineNumber.remove());
17
18        // 获取没有行号的纯文本内容
19        const codeText = tempCodeBlock.textContent;
20
21        navigator.clipboard.writeText(codeText || '')
22        // navigator.clipboard.writeText(codeBlock.textContent)
23            .then(() => {
24                copyButton.textContent = copiedText;
25
26                setTimeout(() => {
27                    copyButton.textContent = copyText;
28                }, 1000);
29            })
30            .catch(err => {
31                alert(err)
32                console.log('Something went wrong', err);
33            });
34    });
35});
左边栏副标题换行
找到 layouts/partials/sidebar/left.html,复制到博客的同名主文件夹下:
1<div class="site-meta">
2    <h1 class="site-name"><a href="{{ .Site.BaseURL | relLangURL }}">{{ .Site.Title }}</a></h1>
3    <h2 class="site-description">{{ .Site.Params.sidebar.subtitle }}</h2>
4    <h2 class="site-description">{{ .Site.Params.sidebar.subtitle | safeHTML }}</h2>
5</div>
当然也可以修改
stack模板下hugo-theme-stack里的文件,但不建议,毕竟还要通过源码进行学习。
然后在 hugo.yaml 中在要换行的地方加上 <br>:
 1languages:
 2    en:
 3        languageName: English
 4        title: Example Site
 5        weight: 1
 6        params:
 7            sidebar:
 8                subtitle: Example description
 9    zh-cn:
10        languageName: 中文
11        title: KukaDam
12        weight: 2
13        params:
14            sidebar:
15                subtitle: "晚来天欲雪<br>能饮一杯无"
Markdown样式
键盘样式
参考 Hugo Stack 魔改美化 | Naive Koala
在 /assets/scss/custom.scss 中加入以下代码:
 1// 键盘样式
 2kbd {
 3  margin: 0 .1em;
 4  padding: .1em .6em;
 5  font-size: .8em;
 6  color: #242729;
 7  background: #fff;
 8  border: 1px solid #adb3b9;
 9  border-radius: 3px;
10  box-shadow: 0px 1px 0 rgba(12, 13, 14, 0.2), 0 0 0 2px #fff inset;
11  white-space: nowrap;
12  vertical-align: middle;
13  font-family: monospace;
14}
这样就可以呈现如下 Markdown 中的键盘样式:
<kbd>CTRL</kbd> + <kbd>C</kbd>
CTRL + C
图床链接图片居中
目前 Stack 默认只支持本地引用的图片居中,而在使用 url 图片链接时没有居中格式。在 /assets/scss/partials/layout/article.scss Line 256 处(同级任意位置)增加以下代码:
1// Center image from url source
2p > img {
3    display: block;
4    margin: 0 auto;
5    max-width: 100%;
6    height: auto;
7}
当启用fancybox时,上面的方法对fancybox不起作用,可以再上面代码的下方添加:
 1.post-img-view {
 2    text-align: center;
 3
 4    a {
 5        display: inline-block;
 6        text-decoration: none;
 7        border: none;
 8        box-shadow: none;
 9
10        img {
11            cursor: zoom-in;    // 鼠标显示放大镜图标
12            transition: transform 0.3s ease;    // 添加缩放动画效果
13
14            &:hover {
15                transform: scale(1.02);     // 悬停时轻微放大
16            }
17        }
18    }
19}
图片放大
- 修改stack主题的配置文件:
hugo.yaml,在params中添加:
1params:
2  fancybox: true
- 在
/layouts/_default/_markup/render-image.html合适位置补充:
1{{if .Page.Site.Params.fancybox }}
2<div class="post-img-view">
3<a data-fancybox="gallery" href="{{ .Destination | safeURL }}">
4<img src="{{ .Destination | safeURL }}" alt="{{ .Text }}" {{ with .Title}} title="{{ . }}"{{ end }} />
5</a>
6</div>
7{{ end }}
记得把原来的代码注释,否则会渲染两张图
 1<!-- <img src="{{ $Permalink }}"
 2	{{ with $Width }}width="{{ . }}"{{ end }}
 3	{{ with $Height }}height="{{ . }}"{{ end }}
 4	{{ with $Srcset }}srcset="{{ . }}"{{ end }}
 5	loading="lazy"
 6	{{ with $alt }}
 7		alt="{{ . }}"
 8	{{ end }}
 9	{{ if $galleryImage }}
10		class="gallery-image"
11		data-flex-grow="{{ div (mul $image.Width 100) $image.Height }}"
12		data-flex-basis="{{ div (mul $image.Width 240) $image.Height }}px"
13	{{ end }}
14> -->
- 同理,在
layouts\partials\article\components\footer.html中添加:
1{{if .Page.Site.Params.fancybox }}
2<script src="https://cdn.jsdelivr.net/npm/jquery@3.5.1/dist/jquery.min.js"></script>
3<link rel="stylesheet" href="https://cdn.jsdelivr.net/gh/fancyapps/fancybox@3.5.7/dist/jquery.fancybox.min.css" />
4<script src="https://cdn.jsdelivr.net/gh/fancyapps/fancybox@3.5.7/dist/jquery.fancybox.min.js"></script>
5{{ end }}
为了看到效果,可以在\assets\scss\partials\layout\article.scss中修改图片放大时的动画:
 1.article-content {
 2    ...
 3    // 为 Fancybox 图片添加样式
 4    .post-img-view {
 5        text-align: center;
 6
 7        a {
 8            display: inline-block;
 9            text-decoration: none;
10            border: none;
11            box-shadow: none;
12
13            img {
14                cursor: zoom-in;    // 鼠标显示放大镜图标
15                transition: transform 0.3s ease;    // 添加缩放动画效果
16
17                &:hover {
18                    transform: scale(1.02);     // 悬停时轻微放大
19                }
20            }
21        }
22}
字体修改
去字体网站,比如【100font】,下载自己想要的字体文件 .ttf
把字体文件放到放入assets/font下(没有自己建)
将以下代码修改并复制到layouts/partials/footer/custom.html文件中
- 字体名:给字体命名一个别名,随便填写就好,保持统一就行
- 字体文件名:字体文件的全名,带后缀名的,也就是 xxx.ttf
 1<style>
 2  @font-face {
 3    /* 提高自定义字体加载速度 */
 4    unicode-range: U+4E00-9FFF,U+0025-00F0,U+3040-30FF,U+1100-11FF,U+3130-318F,U+AC00-D7FF;
 5    font-family: '字体名';
 6    src: url({{ (resources.Get "font/字体文件名").Permalink }}) format('truetype');
 7  }
 8
 9  :root {
10    --base-font-family: '字体名';
11    --code-font-family: '字体名';
12  }
13</style>
测试:l,L,i,I (这几个字母字体用不好分不清)
固定代码块高度
把以下内容添加到 assets/scss/partials/article.scss :
 1.article-content {  // 大概 line 205
 2   .highlight {  // line 331
 3      background-color: var(--pre-background-color);
 4      padding: var(--card-padding);
 5      position: relative;
 6      ...
 7      // 修改
 8      pre {  // 可以注释之前的
 9        margin: initial;
10        padding: 0;
11        margin: 0;
12        width: auto;
13        max-height: 30em;
14        scrollbar-width: none; /* Firefox */
15        &::-webkit-scrollbar {
16            display: auto;
17            /* Chrome Safari */
18        }
19      }
20  }
21}
固定高度后,还要去.yaml文件中修改参数,否则行号和代码块的滚动不一致
1markup:
2  highlight:
3  	lineNos: true
4    lineNumbersInTable: true
5    # lineNumbersInTable:使用表来格式化行号和代码, 而不是标签。这个属性一般设置为 true.
6    # lineNos:是否使用行号
设置lineNumbersInTable: false后,一般手动复制代码块和copy键复制都会把行号复制上,具体的修改看第一节
组件
顶部返回按钮
参考Stack 主题的自定义 | L1nSn0w’s Log
个人不是很喜欢返回键把左边菜单隐藏,给自己留个档。
加载进度条
在layouts/partials/footer/custom.html加入代码:
 1<!-- 加载进度条 -->
 2<script src="https://cdn.jsdelivr.net/gh/zhixuan2333/gh-blog@v0.1.0/js/nprogress.min.js" integrity="sha384-bHDlAEUFxsRI7JfULv3DTpL2IXbbgn4JHQJibgo5iiXSK6Iu8muwqHANhun74Cqg" crossorigin="anonymous"></script>
 3<link rel="stylesheet" href="https://cdn.jsdelivr.net/gh/zhixuan2333/gh-blog@v0.1.0/css/nprogress.css" integrity="sha384-KJyhr2syt5+4M9Pz5dipCvTrtvOmLk/olWVdfhAp858UCa64Ia5GFpTN7+G4BWpE" crossorigin="anonymous" />
 4<script>
 5    NProgress.start();
 6    document.addEventListener("readystatechange", () => {
 7        if (document.readyState === "interactive") NProgress.inc(0.8);
 8        if (document.readyState === "complete") NProgress.done();
 9    });
10</script>
但这个方法可能在引入pjax后会失效,需要查看pjax文档进行监听
樱花背景
下载地址【sakura.js】(CTRL + C 保存),并放到assets/background文件夹下
在layouts/partials/footer/custom.html加入代码:
1<!-- 樱花背景 -->
2<script src={{ (resources.Get "background/sakura.js").Permalink }}></script>
文章最后修改时间
在hugo.yaml加入代码:
 1frontmatter:
 2  # 按优先级排序:
 3  # :git - 文件提交修改时间
 4  # lastmod - 文章里 lastmod 字段
 5  # :fileModTime - 文件修改时间
 6  # :default - 默认时间
 7  lastmod: [":git", "lastmod", ":fileModTime", ":default"]
 8
 9enableGitInfo: true
10gitRepo: "https://github.com/your_username/your_username.github.io"
这个方法比较简单,但是时间会出现在文章末尾:
更新时间的格式去 hugo.yaml 中的 params.dateFormat.lastUpdated 进行修改:
1dateFormat:
2    published: 2006-01-02
3    lastUpdated: 2006-01-02
留档:文章开头显示更新时间,参考【Hugo】Stack主题自定义修改
页面浏览量
这里用的是vercount
修改layouts/partials/footer/custom.html,引入脚本:
1<script defer src="https://cn.vercount.one/js"></script>
修改layouts/partials/article/components/footer.html,(没有文件夹可以从模板中复制)在合适的位置下加入代码:
 1<footer class="article-footer">
 2    {{ partial "article/components/tags" . }}
 3
 4    {{ if and (.Site.Params.article.license.enabled) (not (eq .Params.license false)) }}
 5    <section class="article-copyright">
 6		...
 7    </section>
 8    {{ end }}
 9
10    {{- if ne .Lastmod .Date -}}
11    <section class="article-lastmod">
12		...
13    </section>
14    {{- end -}}
15    <section>
16        页面浏览量<span id="vercount_value_page_pv">loading... </span>
17    </section>
18</footer>
若想浏览次数出现在文章开头,参考【Hugo】Stack主题自定义修改,但是会有bug,咱小白先弄简单的。
页面样式
首页文章标题悬停动画
F12 打开开发者模式,找到标题元素的位置,是在.article-list下的article/h2元素的a标签
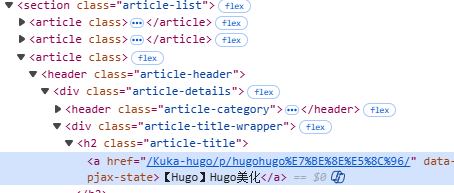
在assets/scss/custom.scss文件中添加代码
1.article-list article h2 a {
2    display: inline-block;
3    transition: transform 0.25s ease;
4}
5
6.article-list article h2 a:hover{
7    transform: scale(1.05);
8}
首页文章分类悬停动画
同理找到该标签的位置,在article-category 的 a 标签中
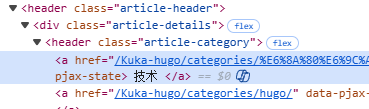
添加assets/scss/custom.scss文件中添加代码:
1.article-category a {
2  display: inline-block;
3  transition: transform 0.25s ease;
4}
5
6.article-category a:hover {
7  transform: scale(1.05);
8}
右侧边栏动画
原理和上面首页的动画方式类似,找到相应位置,在assets/scss/custom.scss中添加代码就行
 1//右侧标签悬停动画
 2.tagCloud .tagCloud-tags a {
 3  display: inline-block;
 4  transition: transform 0.25s ease;
 5}
 6
 7.tagCloud .tagCloud-tags a:hover {
 8  transform: scale(1.05);
 9}
10
11//归档小图标放大动画
12.archives .widget-archive--list {
13  display: inline-block;
14  transition: transform 0.25s ease;
15}
16
17.archives .widget-archive--list:hover {
18  transform: scale(1.05);
19}